

How To Make A Highlight Layer In Photoshop

Loftier Central Glow Consequence With Photoshop
In this Photoshop tutorial, we'll larn how to create a high primal glow upshot, which is a fancy way of saying we'll exist applying a glow but to the highlights in an image. This result works especially well with wedding ceremony portraits since it'due south great for adding a romantic, magical look to your photos, and wedding ceremony portraits usually contain lots of bright white areas to work with.
Nosotros'll see how to easily select just the highlights in an image using Photoshop's Color Range command, then we'll re-create the highlights to their own layer and create the glow effect using a mistiness filter and ane of Photoshop'southward layer blend modes designed for lightening images. Finally, we'll combine layers into a layer group and utilise a layer mask to limit the areas where the glow effect is visibile. It may sound like a lot of work, but once you know how to do it, the entire outcome can be completed in just a few minutes! I'thousand using Photoshop CS4 here, but whatever recent version of Photoshop will work.
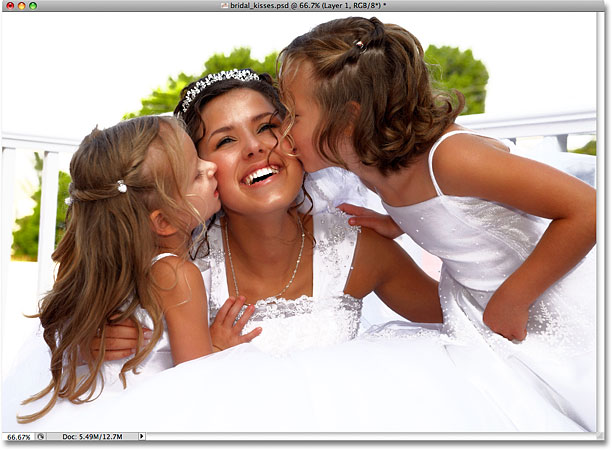
Here'due south the image I'll be using for this tutorial:
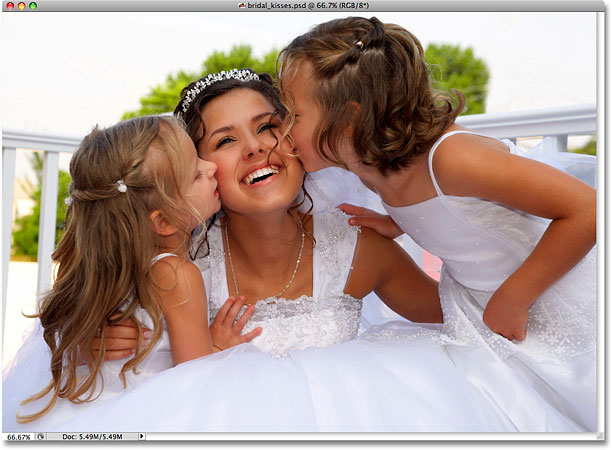
The original image.
Here's how it will look after calculation our loftier key glow result:

The image after applying the glow effect to the highlights.
How To Create A Loftier Fundamental Glow Upshot In Photoshop
Step 1: Select The Highlights With The Color Range Command
With our prototype newly opened in Photoshop, our first step is to select simply the highlights (the brightest areas) in the image. Photoshop gives us an easy mode to select the highlights using the Color Range command, which, like the Magic Wand tool, allows us to select a range of colors or brightness values in an image, although the Color Range control is much more powerful. Go upwardly to the Select carte in the Carte Bar at the top of the screen and cull Color Range:
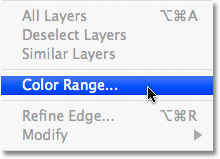
Go to Select > Color Range.
When the Color Range dialog box appears, simply select Highlights from the Select driblet-down list at the top of the dialog box:
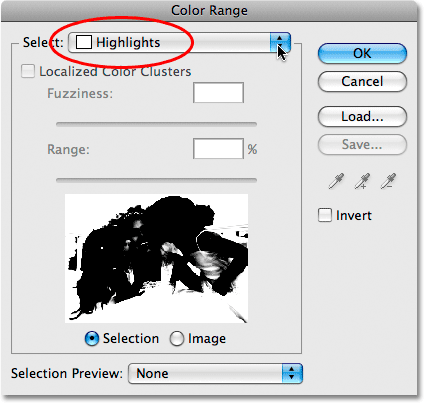
Cull "Highlights" for the Select option at the peak of the Colour Range dialog box.
Click OK to exit out of the dialog box, and if we look at the prototype in the certificate window, we tin now come across selection outlines actualization around all the highlight areas:
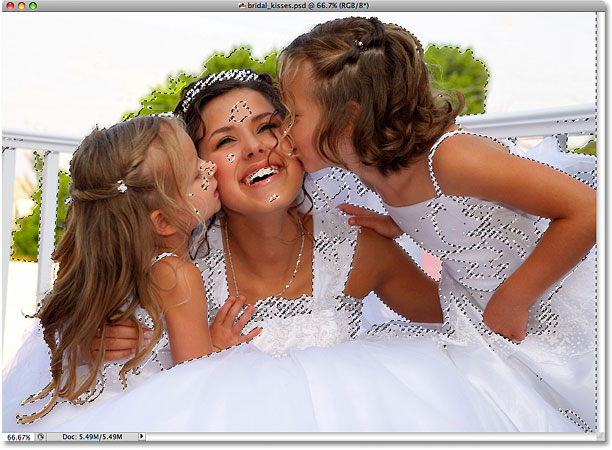
Selecting the highlights in an image is easy with the Color Range command.
Step 2: Copy The Highlights To A New Layer
With the highlights selected, go up to the Layer menu in the Menu Bar, choose New, and and then choose Layer via Copy:
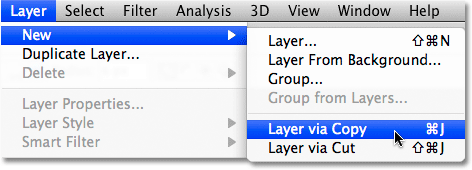
Get to Layer > New > Layer via Copy.
You can too press the keyboard shortcut Ctrl+J (Win) / Command+J (Mac) which is a much faster way to copy a layer. Ordinarily, this would create a re-create of the entire layer, but any time we have something on the layer selected, merely the area inside the selection is copied. In this instance, nosotros have the highlights selected, and so merely the highlights are copied to the new layer.
It won't expect like anything has happened yet in the document window, but if we look in the Layers console (panels are called "palettes" in earlier versions of Photoshop), we can see that we now take a new layer named "Layer 1" sitting higher up the Background layer, which is the layer that contains our original image. And if we look in the preview thumbnail to the left of the layer's name, we tin run into that the layer contains only the highlights from the image. The greyness and white checkerboard design that fills up the remainder of the thumbnail indicates transparency, which means that those areas on the layer are blank:
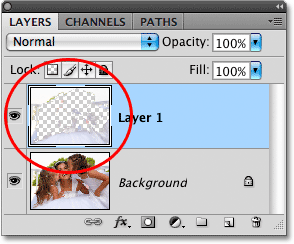
The new layer ("Layer ane") contains only the highlights from the photo.
If you want a meliorate view of exactly what's on "Layer 1", click on the Layer Visibility icon (the eyeball) on the left of the Background layer in the Layers panel:
Use the Layer Visibility icons to temporarily turn layers on and off in the document window.
This volition temporarily hibernate the original epitome on the Background layer from view, allowing us to see but the highlights on "Layer 1", along with the checkerboard blueprint showing u.s.a. the areas on the layer that are bare:
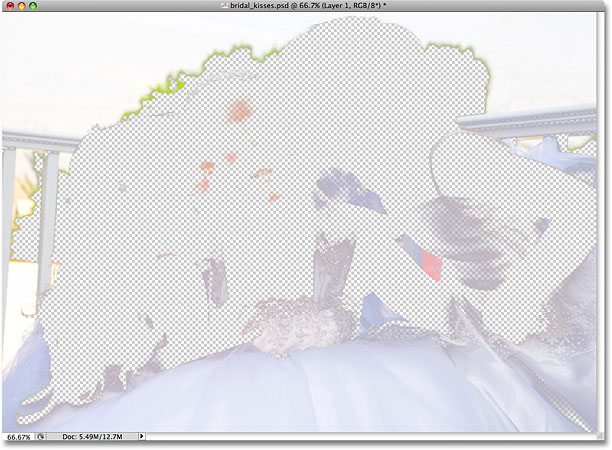
Viewing the contents of "Layer i".
Click in one case once again on the Layer Visibility icon for the Groundwork layer to turn it back on. We'll now use the highlights to create our glow effect!
Step three: Modify The Blend Manner Of "Layer 1" To Screen
You should now be seeing the entire prototype once again in the document window. Make sure "Layer 1" is selected in the Layers panel. The currently selected layer is always highlighted in blue, and then if "Layer ane" is non highlighted in blue, click on it in the Layers panel to select it. Nosotros're going to make the highlights appear much brighter in the image, and we'll do that by changing the layer's blend mode. Y'all'll find the alloy mode options at the tiptop of the Layers panel. By default, layers are set up to the Normal alloy mode, which basically means "boring". Click on the discussion "Normal", so select Screen from the list of alloy modes that appears:
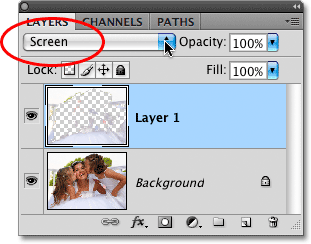
Changing a layer's blend fashion affects how the layer blends in with the layer(s) below information technology.
The Screen blend style is one of a grouping of blend modes in Photoshop that lighten the image, and we tin see in the document window that the highlight areas now appear much brighter, although they also announced rather harsh and blotchy at the moment, only nosotros'll fix that in the next step:
The highlights appear brighter after setting them to the Screen blend mode.
Pace 4: Employ The Gaussian Blur Filter
To create the glow effect, we need to soften the highlights, and we'll exercise that by applying a small amount of blurring to them. Go up to the Filter carte du jour in the Menu Bar, choose Mistiness, and and then choose Gaussian Blur:
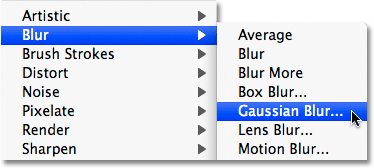
Go to Filter > Blur > Gaussian Blur.
This brings up Photoshop's Gaussian Blur dialog box. Adjust the amount of blurring that's applied to the highlights past clicking and dragging the Radius slider at the bottom of the dialog box. Drag the slider towards the right to utilize more than blurring, or towards the left to reduce the blur amount. You'll want to keep an eye on your epitome in the document window as y'all drag the slider since the corporeality you choose will depend both on your own personal gustation and on the size of your image, merely proceed the amount fairly depression, otherwise yous'll wash out the highlights completely. I'm going to set my Radius value to around eight pixels:
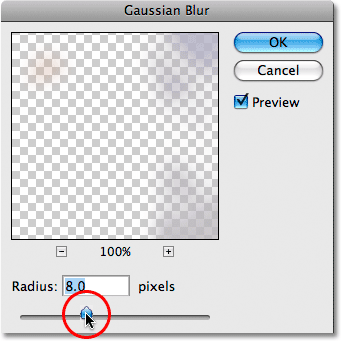
Adjust the amount of blurring with the Radius slider.
Click OK when y'all're done to get out out of the dialog box, at which point Photoshop applies the blurring to the layer. The highlights now appear much softer:
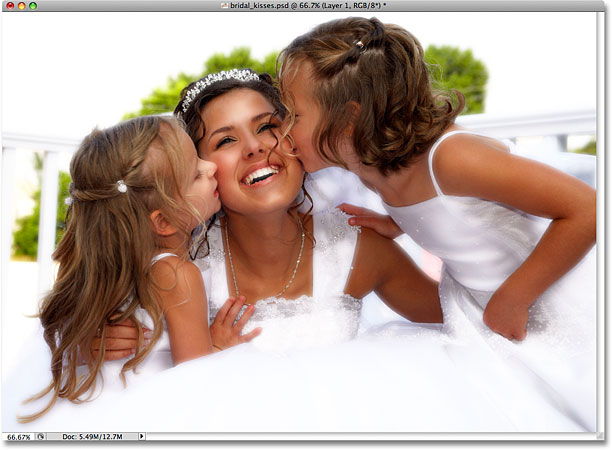
The harsh edges of the highlights have now been softened into a glow effect.
Step 5: Duplicate "Layer i"
To make the glow effect fifty-fifty more intense, permit'due south indistinguishable "Layer ane". In one case over again either go up to the Layer card, choose New, and then choose Layer via Copy, or but press the keyboard shortcut Ctrl+J (Win) / Control+J (Mac). We tin see in the Layers panel that we now take a copy of "Layer 1, which Photoshop has creatively named "Layer 1 re-create", sitting directly higher up the original. Discover that the new layer'due south blend mode has as well been copied and is already set to Screen for us:
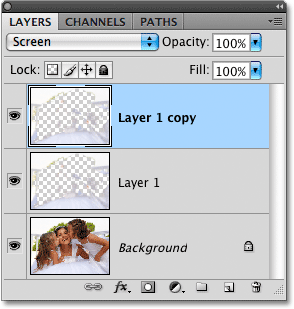
Since no selection was active this fourth dimension, the entire layer was copied.
And if we look in the certificate window, we tin run into that the glow now appears even brighter, although in my case at least, it's becoming too brilliant in some areas:
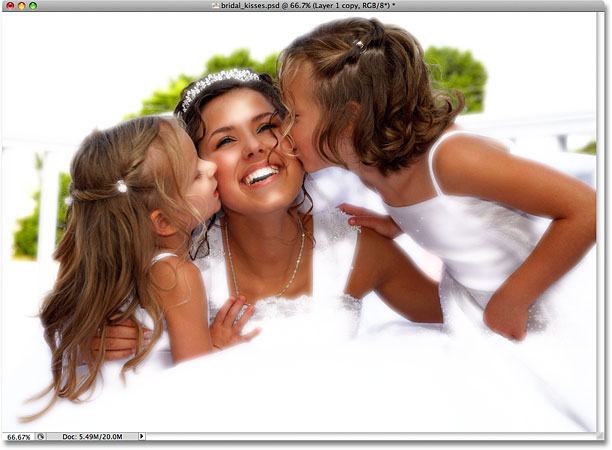
The glow event may now exist a little likewise intense in some areas.
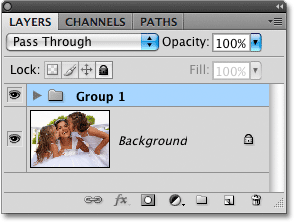
Stride 6: Combine The Two Highlights Layers Into A Layer Group
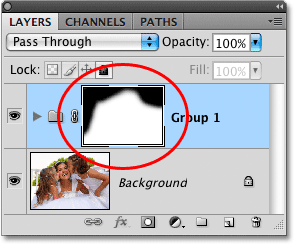
To control exactly which parts of the prototype are afflicted by the glow event, as well as the intensity of the upshot in different areas, we can utilize a layer mask. Since my document contains two divide layers for the highlights ("Layer 1" and "Layer ane copy"), I'1000 going to command both of them at one time by combining the two layers into a layer grouping so calculation a layer mask directly to the group.
First, nosotros need to select the layers that we want to group together. At the moment, I have the meridian layer, "Layer ane copy", selected. To select "Layer 1" below information technology as well, I'll agree down my Shift fundamental and click on "Layer 1" in the Layers panel. This will select both layers at once. We can meet in the Layers panel that both layers are now highlighted in blue, which ways they're both selected:
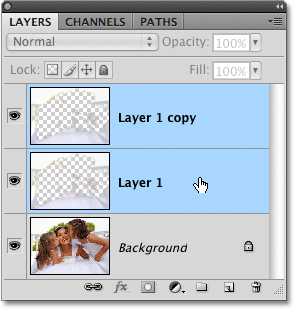
The power to select multiple layers at in one case was first introduced in Photoshop CS2.
To group them together, get up to the Layer menu in the Menu Bar and choose Group Layers:
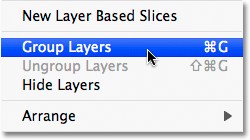
Get to Layer > Grouping Layers.
You can also use the faster keyboard shortcut for grouping layers, Ctrl+Grand (Win) / Command+M (Mac). Either mode tells Photoshop to combine the two layers into a layer group, and we tin meet in the Layers panel that a layer group named "Group 1" appears. Both highlights layers are now within the group:
Click on the triangle icon to twirl a layer group open or closed, revealing or hiding the layers inside it.
Footstep 7: Add together A Layer Mask To The Layer Grouping
Now that both layers are inside the layer grouping, allow's add a layer mask to the grouping by clicking on the Layer Mask icon at the bottom of the Layers console. You'll encounter a white-filled layer mask thumbnail appear to the left of the group'south name:
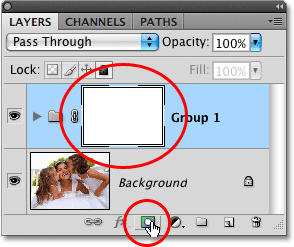
Calculation a mask to a layer grouping allows us to mask all of the layers inside the group at once.
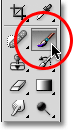
Step eight: Select The Brush Tool
Nosotros're going to paint with blackness on the layer mask to hibernate the glow effect from certain areas of the prototype, which ways nosotros'll need Photoshop's Castor Tool to paint with. Select the Brush Tool from the Tools panel, or press the alphabetic character B on your keyboard to select it with the shortcut:
Adding a mask to a layer group allows us to mask all of the layers inside the grouping at one time.
Footstep ix: Set Your Foreground Color To Blackness
Photoshop paints using whichever color y'all currently have selected as your Foreground color. You can run into what your current Foreground color is by looking at the Foreground color swatch near the bottom of the Tools panel. We want to pigment with black, so if your colour swatch is gear up to anything other than black, press the letter D on your keyboard, which will set your Foreground color to white (the default Foreground colour whenever a layer mask is selected), and so printing the letter Ten to switch information technology to black:
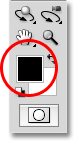
The default Foreground (black) and Background (white) colors are reversed when a layer mask is selected.
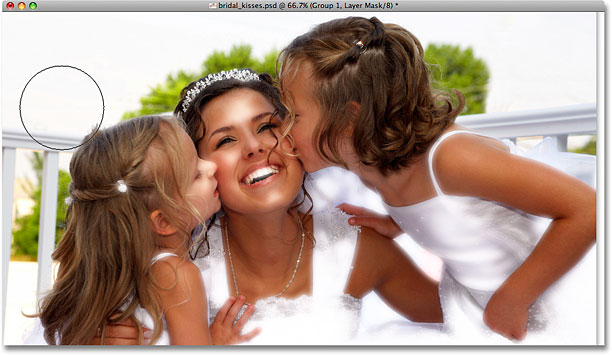
Pace 10: Pigment Over Areas To Hide The Glow Effect
With the Brush Tool selected and black set as your Foreground color, pigment over whatsoever areas in the prototype where yous desire to hide the glow effect. Since we're painting on the layer mask, non the image itself, you won't meet any black appearing as you paint. Instead, y'all'll see the glow outcome disappearing from view in those areas.
Y'all can control the size of the brush every bit yous paint using handy keyboard shortcuts. Press the left subclass central ( [ ) to make the brush smaller, or the correct bracket primal ( ] ) to make it larger. You'll desire to use a soft edge brush as you paint, and you can control the hardness of the brush edges by adding the Shift cardinal to the shortcuts I just mentioned. Press Shift+left bracket ( [ ) to make the brush edges softer, or Shift+correct bracket ( ] ) to make them harder.
I'm going to paint along the top and sides of my image to hide the glow effect from those areas and bring dorsum the detail in the groundwork:
Painting with black on a layer mask hides the content of the layer(southward) in those areas.
If nosotros look at the layer mask thumbnail in the Layers panel, nosotros can see exactly where we've painted with blackness:
The layer mask thumbnail shows u.s. which areas of the image we've painted over.
For areas where yous simply want to reduce the intensity of the glow, non remove it completely, paint with your castor set to a lower opacity. You'll find the Opacity option in the Options Bar at the pinnacle of the screen. I'm going to lower my brush opacity downwards to fifty%:

The Options Bar shows options for whichever tool is currently selected. Here, it displays options for the Brush Tool.
I want to bring back a subtle amount of detail in the helpmate's dress along the bottom of the photo, then I'll paint over it with my brush set to 50% opacity. This blends the effect in with the original image rather than removing it entirely:
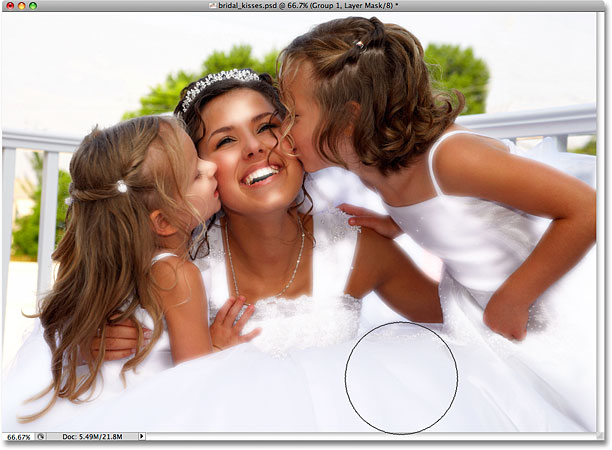
Use a lower opacity brush in areas where yous want to reduce the intensity of the issue.
I too want to reduce the glow upshot in the straps of the bride's clothes, and I think her teeth are starting to wait also much similar a toothpaste commercial, so I'll paint over those areas with my 50% opacity brush as well. If yous want a better view of exactly where you've painted on the layer mask, agree downward your Alt (Win) / Choice (Mac) central and click directly on the layer mask thumbnail in the Layers panel. This will allow you to view the layer mask itself in the document window. Here, we can see the areas forth the superlative of the photo where I painted with black. The lighter grey areas are where I painted with my brush opacity prepare to 50%:
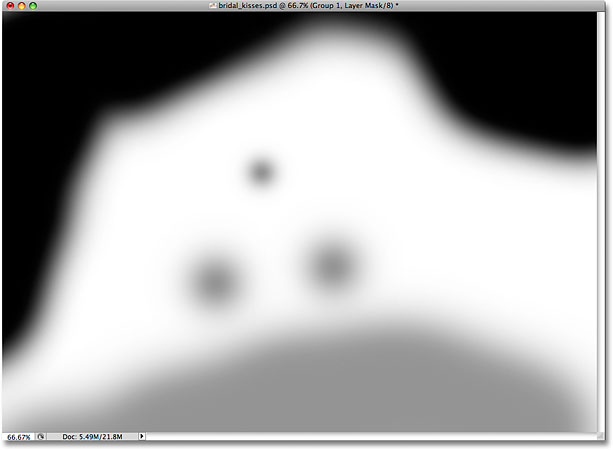
Hold down Alt (Win) / Selection (Mac) and click on the layer mask thumbnail to view the mask inside the document window.
Switch back to the normal document view manner by again holding downward Alt (Win) / Choice (Mac) and clicking on the layer mask thumbnail in the Layers console. And with that, nosotros're done! Here is my final "high key glow effect" effect:
The final high key glow effect.
Other Stuff
© 2022 Photoshop Essentials.com.
For inspiration, non duplication.
Site design by Steve Patterson.
Photoshop is a trademark of Adobe Systems Inc.
Source: https://www.photoshopessentials.com/photo-effects/high-key-glow/
Posted by: ricemationsills1950.blogspot.com
0 Response to "How To Make A Highlight Layer In Photoshop"
Post a Comment